
When we were preparing to harvest honey for the first time, we looked at the various ways of honey extracting. Of course an extractor is the ideal way but we did not have one and did not feel two hives would justify the expense of purchasing one.
We settled on the bucket method. Using the bucket method, the honeycomb is de-capped, cut from the frame and crushed up. It is placed in a bucket which has holes drilled in the bottom of it. This bucket is set on top of another bucket. (More details in the instructions.) The honey will drain into the bottom bucket leaving the wax/comb in the top.
We chose to add a honey gate to our “receptacle” buckets for ease of dispensing. You simply have a jar ready underneath the gate, loosen the wing nut, lift the handle and let it pour!
It is really quite simple to make this extracting system.
Materials:
- 2 – 5 gallon buckets with lids
- drill with 1/8″ drill bit
- jig saw
- marker
Optional:
- honey gate with seals (available from Amazon)
- hole saw (we needed a 1.75″)
- tape measure
Instructions:
You will cut the center out of one lid.
- Place lid on a level surface and set one bucket on top of it.
- Use the marker to trace the base of the bucket onto the lid.
- Use your jig saw to cut 1/2″ along the INSIDE of the line you traced. (If you cut ON the line, the top bucket will fall through the hole.) You may want to draw a second circle to help guide your cutting. (see picture)
- Next turn one bucket upside down and drill multiple holes in the bottom.
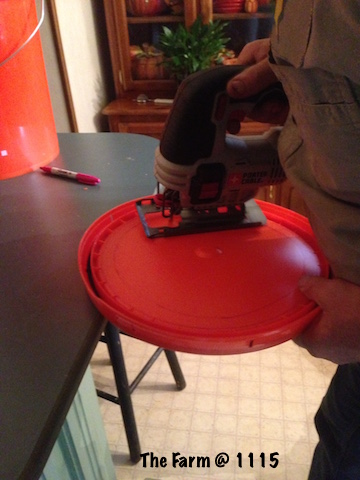
Trace the bottom of a bucket onto the lid. Then draw another circle 1/2″ from the first. Cut out on the second circle.
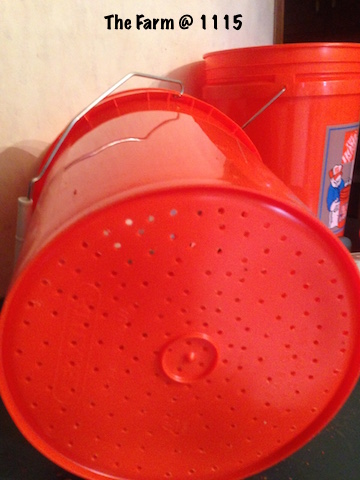
Drill multiple holes in the bottom of one bucket.
Instructions for Optional Equipment:
If you have decided to install a honey gate you will install it on the bucket with the SOLID bottom. To determine where you want the gate you can use your tape measure and mark it or just eyeball it. We installed our about 1/2″ from the bottom. Once you have decided, use the hole saw and cut your hole and install the gate.
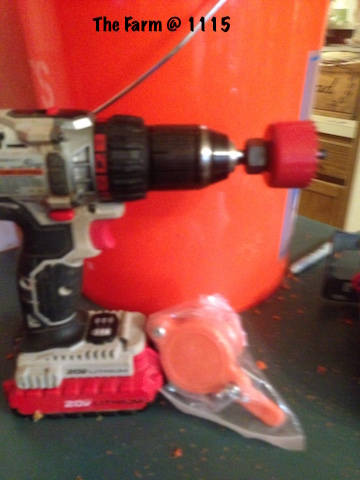
Equipment for installing a honey gate.
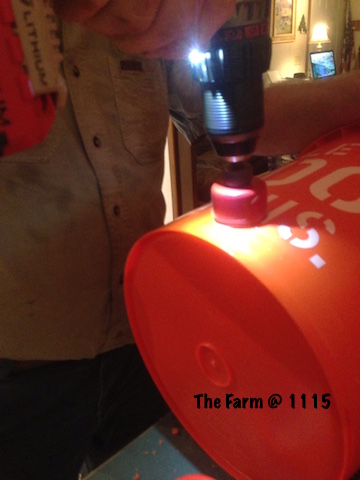
Cutting the hole.
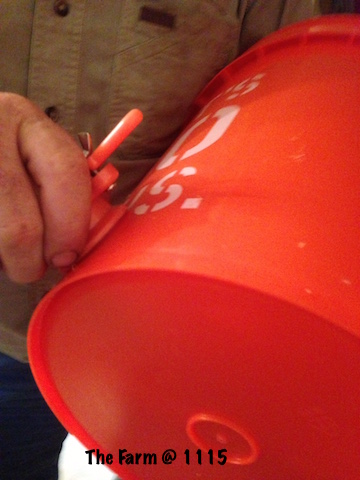
Installing the gate.
Wash your buckets and check the gate for leaks. It is easier to clean up water leaks than honey.
Set up the buckets:
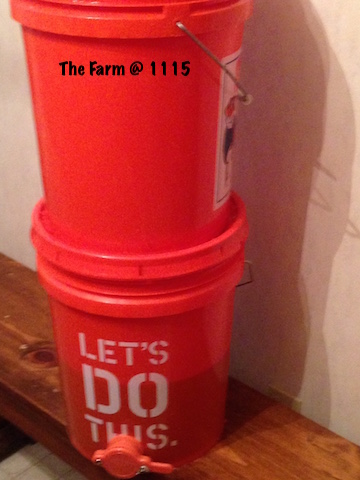
Stacked honey extracting buckets. See how much honey is in the bucket?
Put the correct lid on the correct bucket!
- The solid lid goes on the bucket with the holes in the bottom of it.
- The lid with its center cut out goes on the bucket with the solid bottom.
How to use the bucket method:
- Stack the bucket with holes in its bottom on top of the bucket with its center cut out.
- De-cap the honeycomb (I de-cap mine into a dishpan.)
- Cut the honeycomb out of the frame into the top bucket.
- Use a knife to cut up the honeycomb and a potato masher or similar to crush it up.
- I do 3 or 4 frames at a time because it can be difficult to stir and mash with more than that.
- Put the lid on and let it drain.
- Stir and mash several times a day (can be done over a couple of days) until honey is drained from the comb.
Using this method, there is no need for further straining or filtering. The honey is ready to jar up.






12 Comments
I’ve never found a HomeDepot bucket, like the ones used in the photos, that was food grade.
If you are using non-food grade equipment to process your honey please don’t sell it.
I’d hate for backyard beekeepers to get bad rap, due to not using food grade equipment.
Lowes has a line of 5 gallon buckets that is food grade. It’s maybe a buck more than the non-food grade 5 gal buckets.
In the Memphis Tennessee Area 5gal. Food Grade Buckets Are Available For $4-5.95 At TSC, Wal- Mart, Home Depot, & Lowe’s stores.
Firehouse Subs sells their pickle buckets for $2.00 each and that includes the lid. They really smell so you have to clean them out with bleach and air them out for a while but it is worth it.
Do you replace frames in bee hive while still wet with honey?
After processing your honey put them back in the hive they came from. They will clean and repair frames. If you still have a good flow going you can most likely pull again in a month or so.
you should be using food safe buckets for this project, they can obtained at any deli or food supply retailer. You can also get buckets from any of the bee supply houses that already have the gate and hole supplied.
May I suggest these improvements:
Careful, here: a homer bucket from the Home Depot is not “food grade” so it is fine if the honey is for home consumption, but if you want to sell it …. You can purchase a white bucket or two from a beekeeping supply company. It is really not much more and it may have the honey gate thrown in for kicks. This project is otherwise well done. I would put a little more than a 1/2″security margin on the bottom lid: a bucket full of honey can be quite heavy.
To make that crushing easier using 2 rollers that sandwich the comb would make that infinitely easier. It would also not have you pushing down on the honey and risk passing the top bucket inside the bottom bucket. (some of that plastic is a little too thin and can tear.
If you are old enough to remember the first “clothes dryer” that had 2 rollers, you would put the clothes between the rollers and turn the crank. I have not seen those in a long time but that would be faster and the comb would stay more or less in one piece.
From the size of the holes that are made in that top bucket, everything that is smaller than 1/4″ will get through. How about using a paint filter between the bottom bucket and the “ring” that is holding the top bucket?
If you are doing it during warm enough weather, it will flow through easily and look gorgeous.
Great blog post! I use a crush and drain method similar to this, but I used a white bucket from the honey store that came with the gate and then a double strainer set in the top. This strained out more of the debris. I will write a blog post about it when I get a spare minute! I definitely would not use these orange buckets even for home use (hey – you matter!) I do worry that even the white food grade buckets are probably not BPA free… I do get the honey into glass as quickly as possible and don’t let it sit in the bucket. Thanks for sharing and starting this dialog!
An easy improvement is to buy a medium sieve/strainer that is fitted for a 5 gallon bucket, They are available from beekeeping supply companies. I also recommend using a food grade bucket.
THIS is a crime. If U can buy a bucket U can make an extractor. Get any food grade bucket and get PVC ‘T’ a size larger than two feet PVC pipe U require to tie the comb. Fix the T inverted at the bottom of the bucket by using PVC pipes on either end of the PVC T to the bucket wall so that the leg of the T stand upwards. Now tie the comb to the two feet PVC pipe and insert into the T. Now rotate clock wise and there is UR honey.
Looks easy enough! Wish I wasn’t so terrified of tiny, flying things with stingers. This looks like something I could enjoy doing.
Fantastic article!
Home depot buckets aren’t FOOD GRADE, Don’t use them