
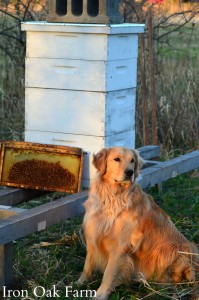
 Elevating a beehive off the ground can be helpful in several ways.
1. It stops the beehive floor from coming in contact with the damp ground. This will prolong the structural life of your hive and cut down on mold and fungi issues.
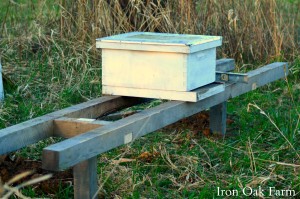
2. Elevating can also help prevent some predators from attacking your hive. This stand elevates several hives 18 inches off the ground. I read in an old log cabin building book that if you build a structure 18 inches off the ground, that crawling insects are less likely to reach the structure. 18 inches also seems to be the magic number to detour skunks.
3. Having the bees a little higher is also convenient for checks as far as humans are concerned. (But don’t go too high or you’ll be lifting top boxes over your head.)
4. It allows the bees easy access to their hive entrance. We used to have our hives on cinder blocks, but the blocks were just a little too small and the weeds and grass quickly covered the short 6 inch blocks. We were constantly clearing vegetation away from the hive entrance and it often irritated incoming bees that we were blocking their entrance.
This stand also has only two legs which means less contact with the ground. It can be made from recycled materials and can be painted to last longer.
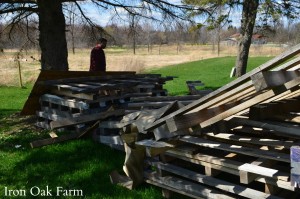 Zach and I heat our farmhouse through the winter with wood only. Lucky for us, Zach works at a company that gets steel delivered on large pallets made of untreated hard wood.
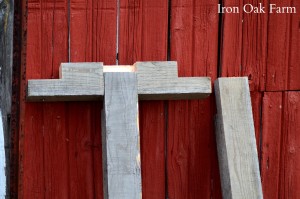
 The pallets are not only useful to heat our home, but we’ve made many projects out of the quality lumber. Like this beehive stand.
Materials Needed:
3 – 10 foot 4×4 boards
measuring tape
table saw or cross cut hand saw
chisel
wooden mallet
post hole digger
long, weather proof screws
drill
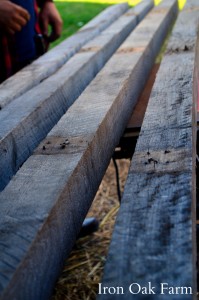
 We began by removing any nails from the wood and selected 4 relatively straight pieces. If you don’t have access to recycled pallets, store bought 4×4’s would work just as well. These boards measured 3 3/8 ”
Cut two 18″ long pieces, two 42″ pieces and two 10′ pieces. (our 4x4s were already cut to 10′ so we just left them this length)
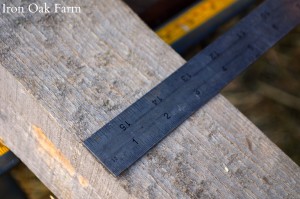
 To make the half lap joints on the 18″ cross supports and the 42″ uprights, set your table fence 3-3/8″ away from your blade. Set your table saw depth to half of the width of the 4×4. we set ours to 1-11/16″. Cut both sides of the 18″ boards, but only one side of each 42″ board. To remove the excess wood, make several cuts with the table saw.
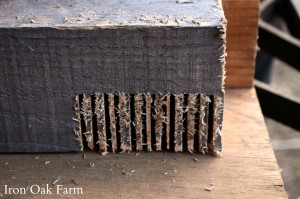 Till you span the width of the joint.
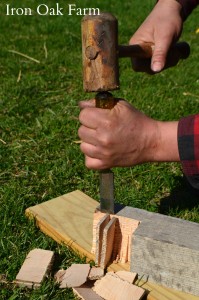 Chisel out the slots.
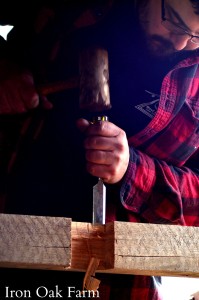 Use the chisel to clean up the joint.
 Keep checking the fit.
 Next cut a 3-3/8″ wide joint 1-11/16″ deep 90 degrees to the other joints on the two 18″ boards. Put these right in the middle of the boards as shown here.
Make two more 3-3/8″ wide 1-11/16″ deep cuts on each of the 10′ long boards. These should be placed approximately 2′ from each end on the same side.
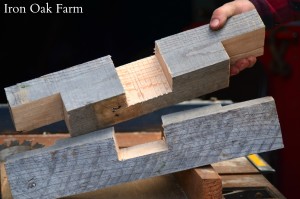
 You can see here that these are a tight fit. Some light blows with a mallet and these will fit together nicely.
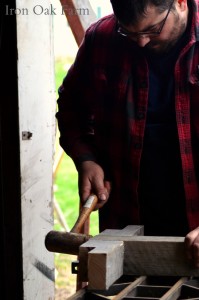 Use a mallet to lock the pieces together.
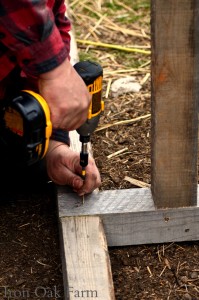
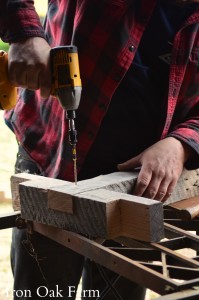 And reenforce with screws. We put two on each side.
 All the joints together.
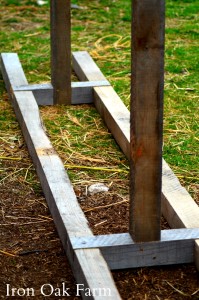 This view, the stand is sitting upside down.
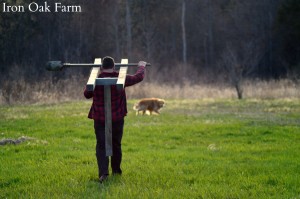 Then Zach carried it out to the bee hive area. (Trusty dog Oliver, leading the way.)
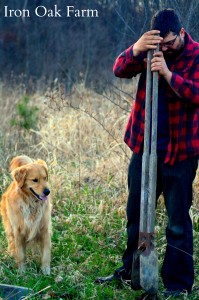
When we got out to our hive, Zach dug two 24 inch holes with the post hole digger. Oliver watched over production.

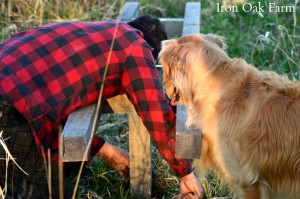
We leveled the length of the stand. Adding or subtracting dirt from each post hole.
 And then we tilted a few degrees forward, so the entrance of the bee hive dips down slightly. This prevents rain from flowing back into the hive.
Then we packed dirt around the holes. Our soil has a lot of clay in it. You could add cement to make it a permanent structure. But we wanted the option to move it.
And it’s all set for our bees due in this week.
We have another hive that is ready to carry out that will sit next to this one.


13 Comments
Do hope that you also know that just picking up a hive and moving it isn’t the right way to do this. You could move them a few inches at a time or close them up and move them over 5 miles away for a couple of weeks and then bring them back to your place and on the new hive stand. Bees get their direction bearings from the sunlight. Also they recognize their surrondings by sight and smell so if you just picked them up and moved the hive say a 100 yrds most of th eworker bees would go back to the old hive placement when they returned, and the ones on their cleansing flights would do the same if they had been out and about before. So be careful on moving them please.
Any post hole less than 3 feet deep and actually 4 feet if you seriously do it right in northern Ohio will eventually let the post tip and wander out of vertical. guaranteed – based on a lifetime of observing misaligned poles and posts. so why waste your time and effort on guaranteed alignment failure ?
I had my hives on separate stands for 2 years. After this past winter’s devastating losses (for huge amounts of hive owners) I moved my one remaining hive to a higher off-the-block stand. I used the solid blocks for ends, stacked them 3 high, and put 2 4x4s on top. Then, while I had the hive in pieces (boxes not yet stacked) I started with the bottom board and moved it all to the new configuration. A month later, I split the hive without regard to where the queen was. I knew I was taking a chance, but it worked (they made a queen). Now I have 2 hives, and I am waiting for a nuc from our local club, so I will be back to 3 hives. Sometimes you have to trust your gut, and take the chance. If I hadn’t split that hive, they would have swarmed, and the queue going into that entrance now is worse than the Atlanta airport!
Nice stand. My wife is thinking of keeping bees starting next year and I was wondering about a configuration for the stand.
How many hives do you keep on a 10′ stand?
We are only thinking of having 2 hives, so could we cut the length in half?
Thanks!
Thanks for the good clear and concise post. Now, can I borrow Zach and that beautiful four-legged pal?
There are concrete blocks available at home depot or other stores that have a cut out in the top for a 4×4 post. They are used for decks. I would think if this design had 4 legs instead of 2 you could set it up without the posts touching the ground and prolong the life of the stand. Thanks for sharing this great design!
[…] move them to a higher location immediately or put them on an elevated stand. You can make a simple bee hive stand out of wood from your local hardware […]
Hi
I am building a top bar hive and wondered wether I can use plywood and roofing felt to cover the top.
My husband and I are wanting to start being bee keepers, and we are looking for any advice on how to do so. It’s good to know that when it comes to building the stands for the beehives, that we should have them a little elevated. This way we can avoid predators getting them, and easier for us to check them.
[…] bee hive stand is something you may not know you need until it arrives. While many beekeepers create a makeshift […]
Built one like this tonight. All from recycled 4x4s. Love a great free project.
Thanks for the great idea!
Is it possible to put out and totally empty bee hive and get bees that live locally?
Excellent work. I did very similar, but without the joints.
I saw a comment about moving hives. I have moved many hives all different distances. There is no issue with moving them 1 foot or 100 feet, or whatever. Just place a leafy branch in front of the hive entrance and when entrance is opened after the move, bees will reorientate. Not an issue.
Again, congrats on your stand and enjoy your bees.
Matt
Sydney, Australia